Showing posts with label sewing. Show all posts

Thursday, November 15, 2012

Fall Inspired Potholder


I'm not ready to dive into Christmas quite yet, so I decide to complete one last fall project. Can you believe Thanksgiving is in a week ?!?! Where has the time gone this year?

I had some padded quilter's fabric leftover from my DIY Laptop Case project, and decided to make some potholders.We already have Halloween and Christmas kitchen accessories, but no Thanksgiving...well, not any more.


First, I created a template for the potholder by tracing and adapting a current potholder. I pinned the template to the fabric and cut.


I hemmed the edges and sewed the two fabric pieces together, inside out.


All sewn up!


Flip right side out.


For the applique, I cut out a leaf and flower bundle from some leftover fabric I had from making curtains last weekend. I used Heat-n-Bond in applying the applique.


After finding the placement of the applique, I secured it by using my flat iron. I hate dragging out the iron and ironing board for simple things, like adhering an applique or ironing a hem. One, because I'm lazy, and two, my iron and I do not get along since I burned my hand down to the muscle two Thanksgivings ago. Stupid tablecloths.


Voila! A cuter way to pull the stuffing and pies out of the oven!

Monday, November 12, 2012

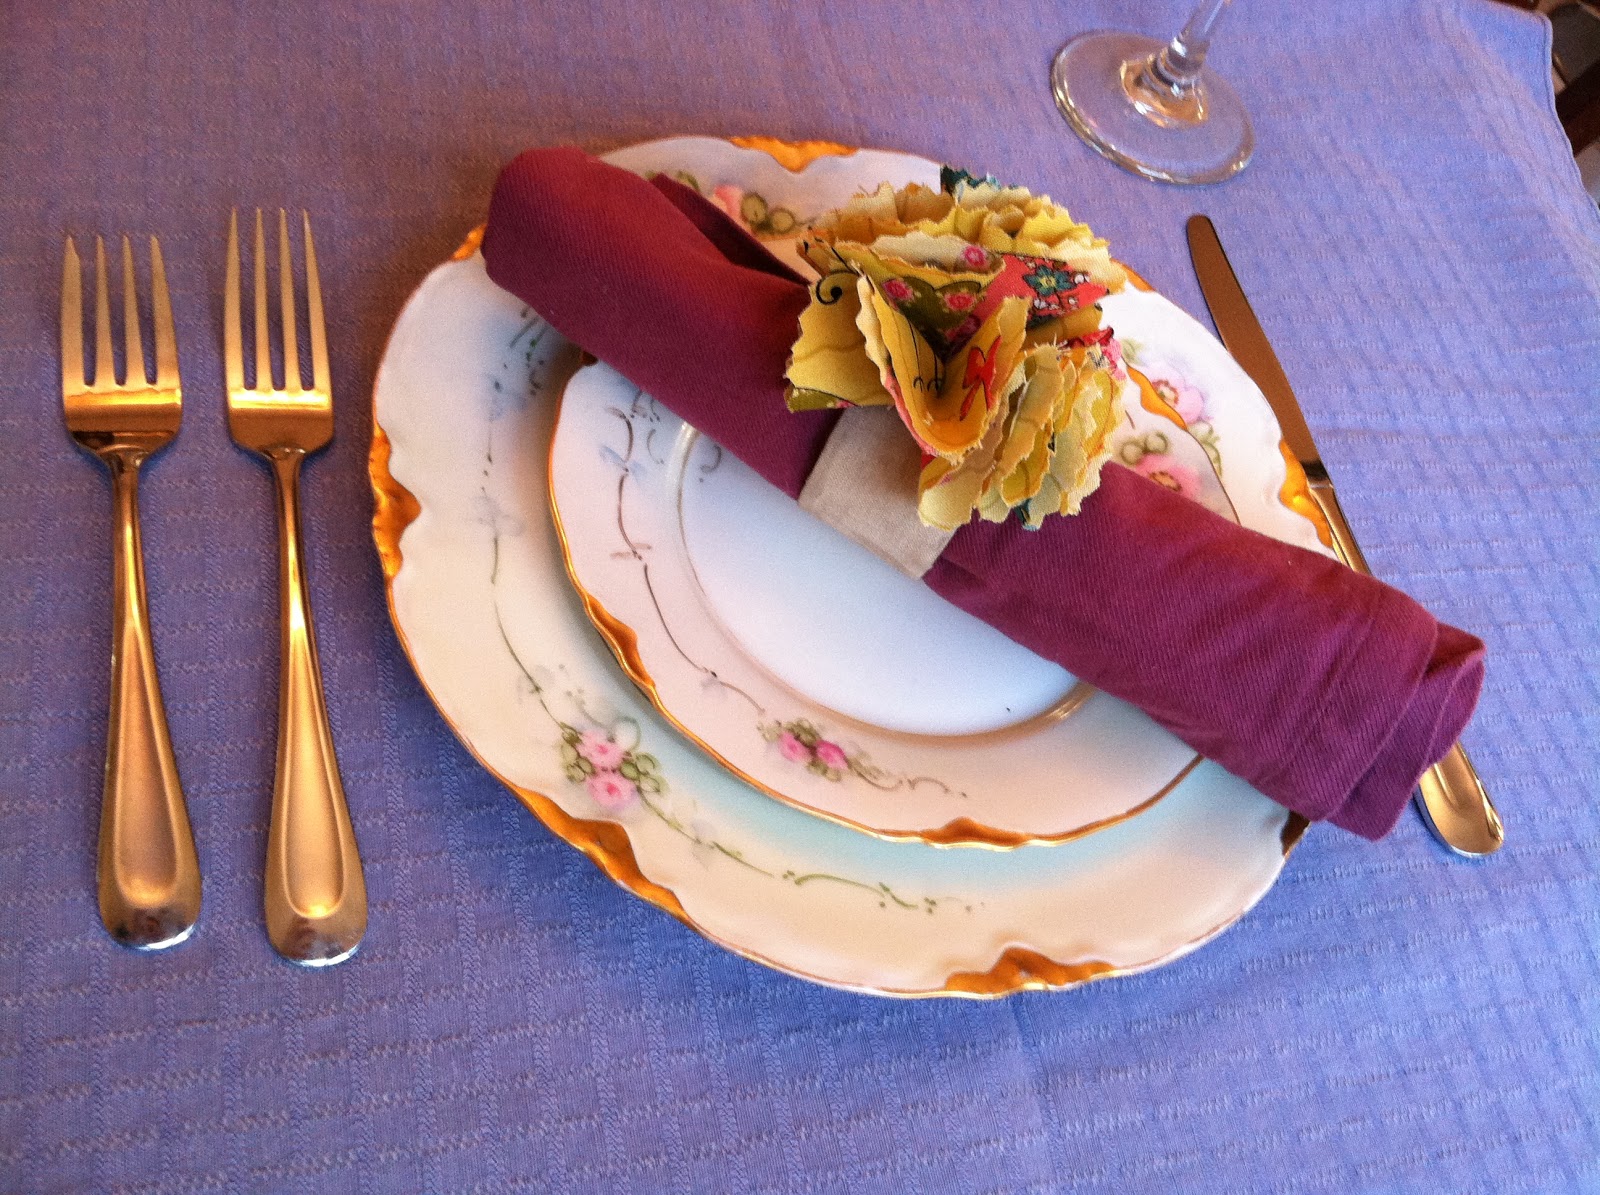
Fabric Flower Napkin Rings


As we begin our countdown to Thanksgiving, I have slowly been putting together the table scape and decorations. We are having ten people in total breaking bread together. I wanted to make napkin rings that would match the fabric flower on the Give Thanks Banner I made last week.


First, I started by cutting out fabric circles with my pinking blade, that measure 3 1/4 inches in diameter.

To make the flower:


Fold the fabric circle in half, and then bring the fold into the center. To hold the shape of the flower, sew the bottom together. This makes one petal. Repeat eight times.


Sew four of the petals together in a row, at the bottom.


Sew two groups of four petals together at the bottom, to create a poofy flower.


To create the ring, I cut a paper towel roll tube into 1 1/2 inch sections.


I mod podge-ed 2 inch wide fabric onto the tube, folding over and adhering the excess fabric to the inside of the tube. Let dry for a couple of hours.


While the tubes dry, cuddle up and take a nap with your 110 pound puppy.


Once the tube is dry, adhere the flower to the ring using hot glue.


Voila! A gorgeous fabric flower napkin ring to celebrate Thanksgiving!


Thursday, November 8, 2012

Give Thanks Banner


I made this "Give Thanks" banner by sewing scrapbook monogram letters (from Serendipity & Shine On) onto fabric triangles. The triangles have a base of 5 1/2 inches with a length of 8 1/4 inches. I used a pinking rotary blade on the edges of each triangle. I connected the triangles together by sewing them together via ribbon. 


As a spacer between the words, I added a fabric flower. I made the flower by cutting out different size circles with the pinking blade from a chicken fabric I found in the remnants bin at Jo-Ann's. I layered the circles and attached them together with a printed wooden button (also by Serendipity & Shine On).

More angles of the banner:


Tuesday, November 6, 2012

DIY: Laptop Case


Fortunetly, I was able to replace the screen to my laptop, when it cracked about a month ago. (By purchasing on Amazon, and having Bryan do the hard labor.)


I knew I was going to have to buy a laptop case to protect the new screen. However, I didn't find any I loved enough to shell out money for, so I decided to make my own.


I found the brown quilter's padding in the remnant bin at Jo-Ann's. The floral fabric is from Fancy Tiger Crafts. Last but not least, an 18 inch zipper that matches the fabric.


First, I traced the perimeter of my laptop with a Sharpie onto card stock. The thickness of the pen, made the outline wider than the laptop, which allowed for seam allowance.


I traced the card stock pattern onto both the quilter's padding and the fabric. I pinned and stitched them together.


To allow the laptop to easily slide in and out of the case, I added a one inch edging between the two side panels.


Install the zipper, ensuring both side panels line up evenly on both sides.


On the first side, pin the edge to the side panel and sew. Turn the case inside out and pin and sew the other side.


All sewn up!


 Flip right side out and you are ready to go!

Featured On:


TutusandTeaParties